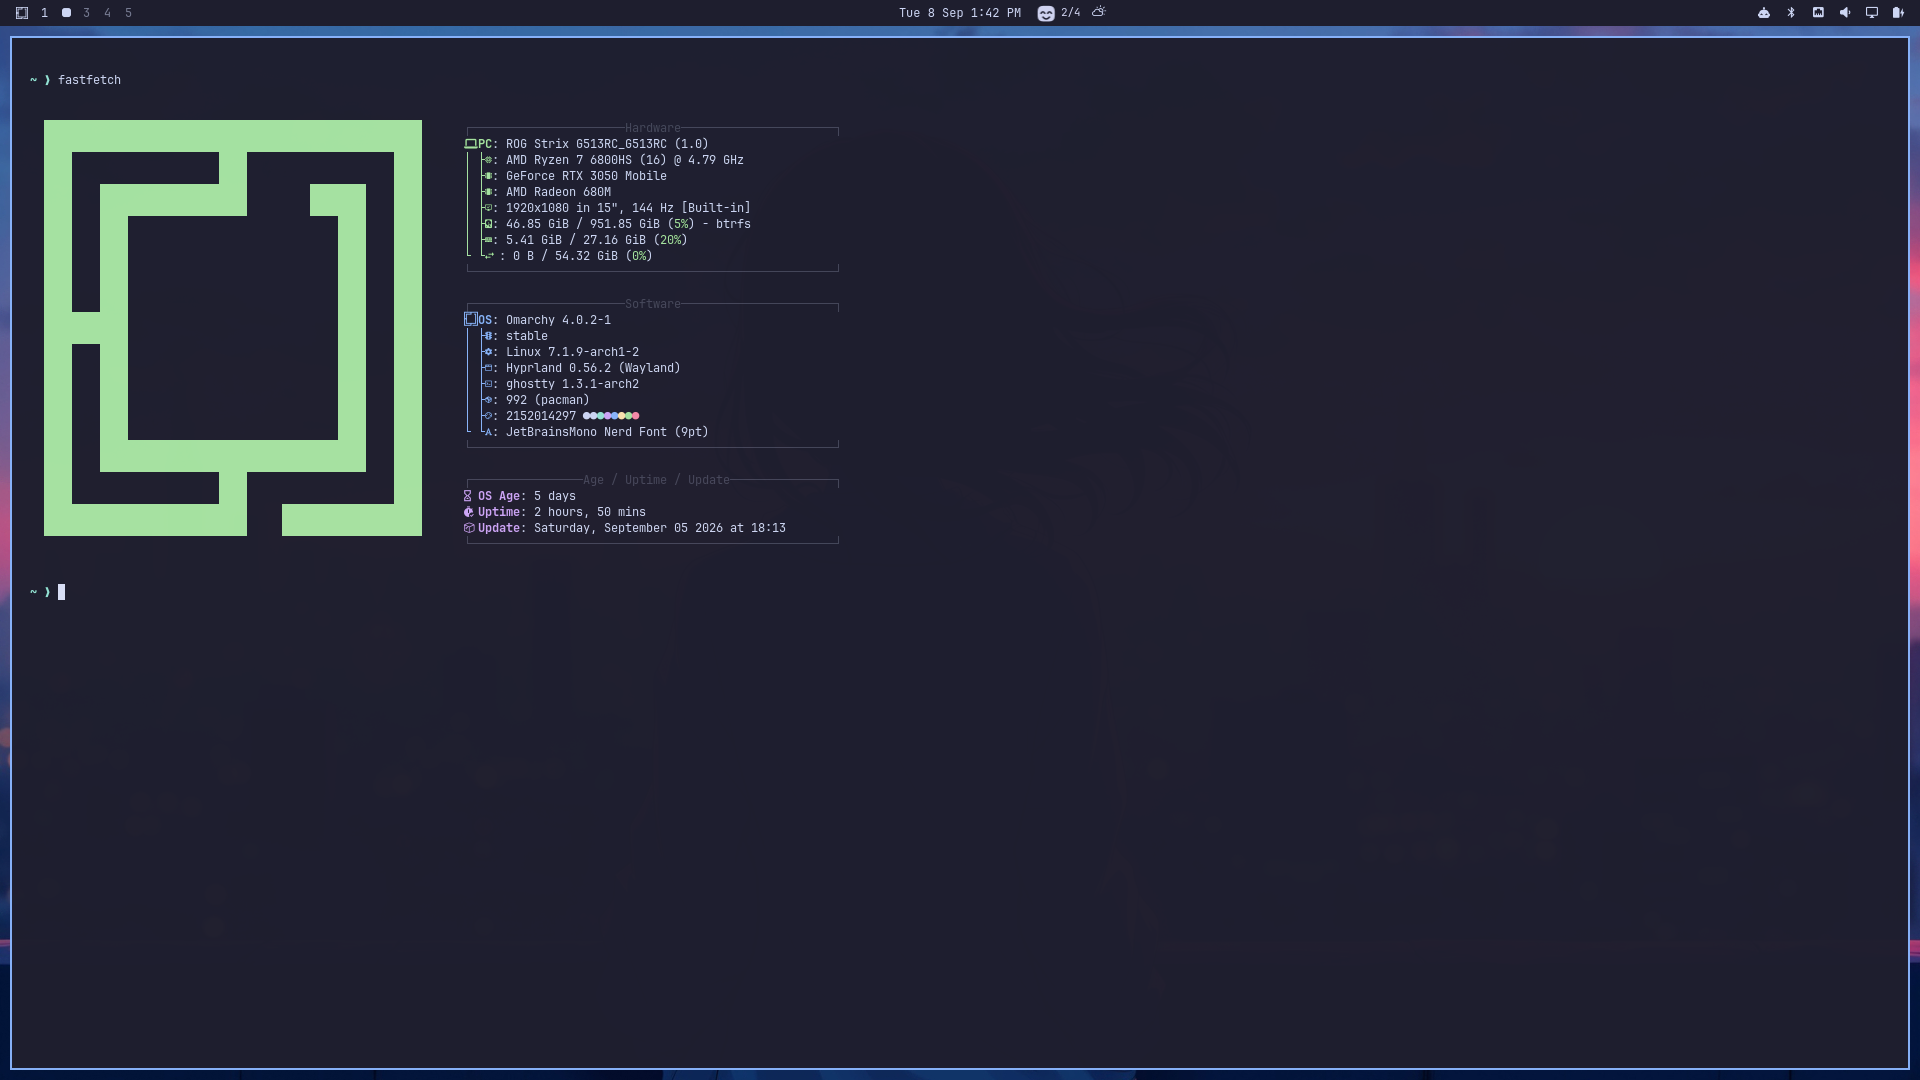
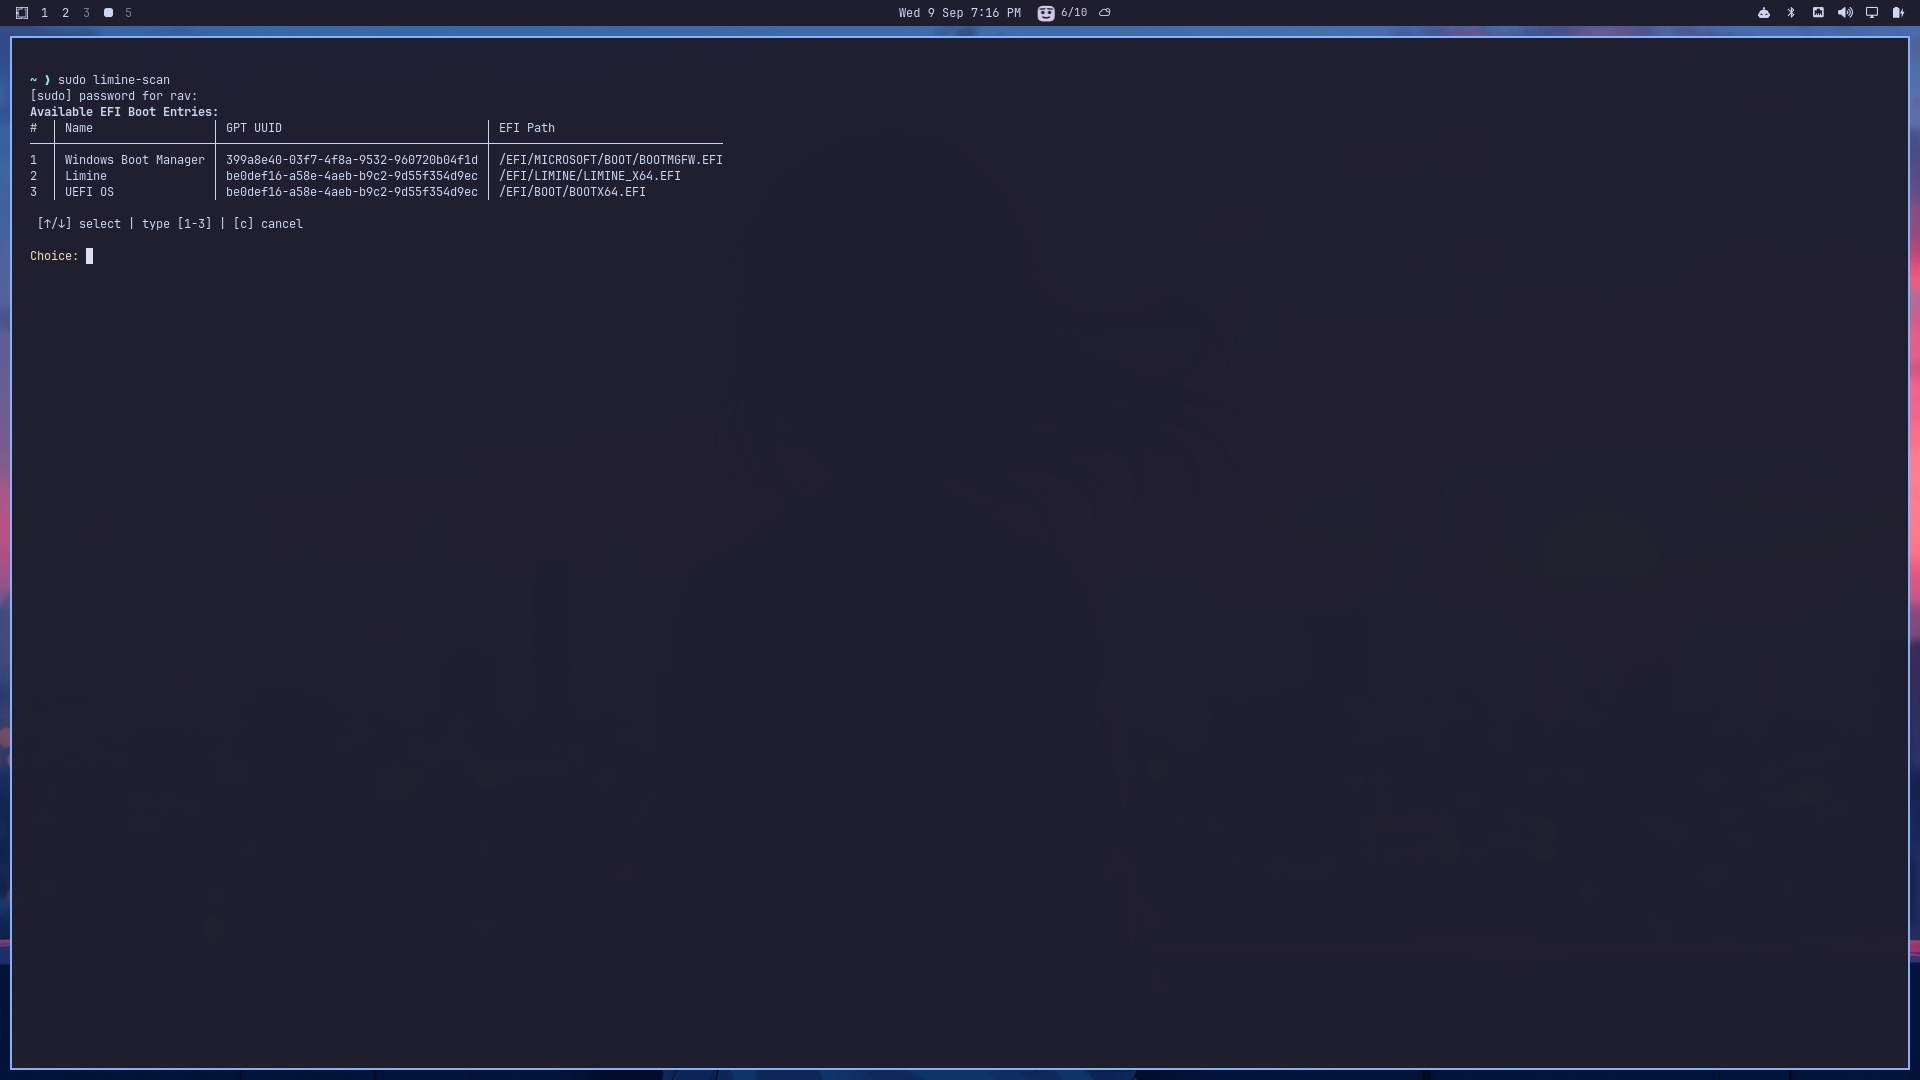
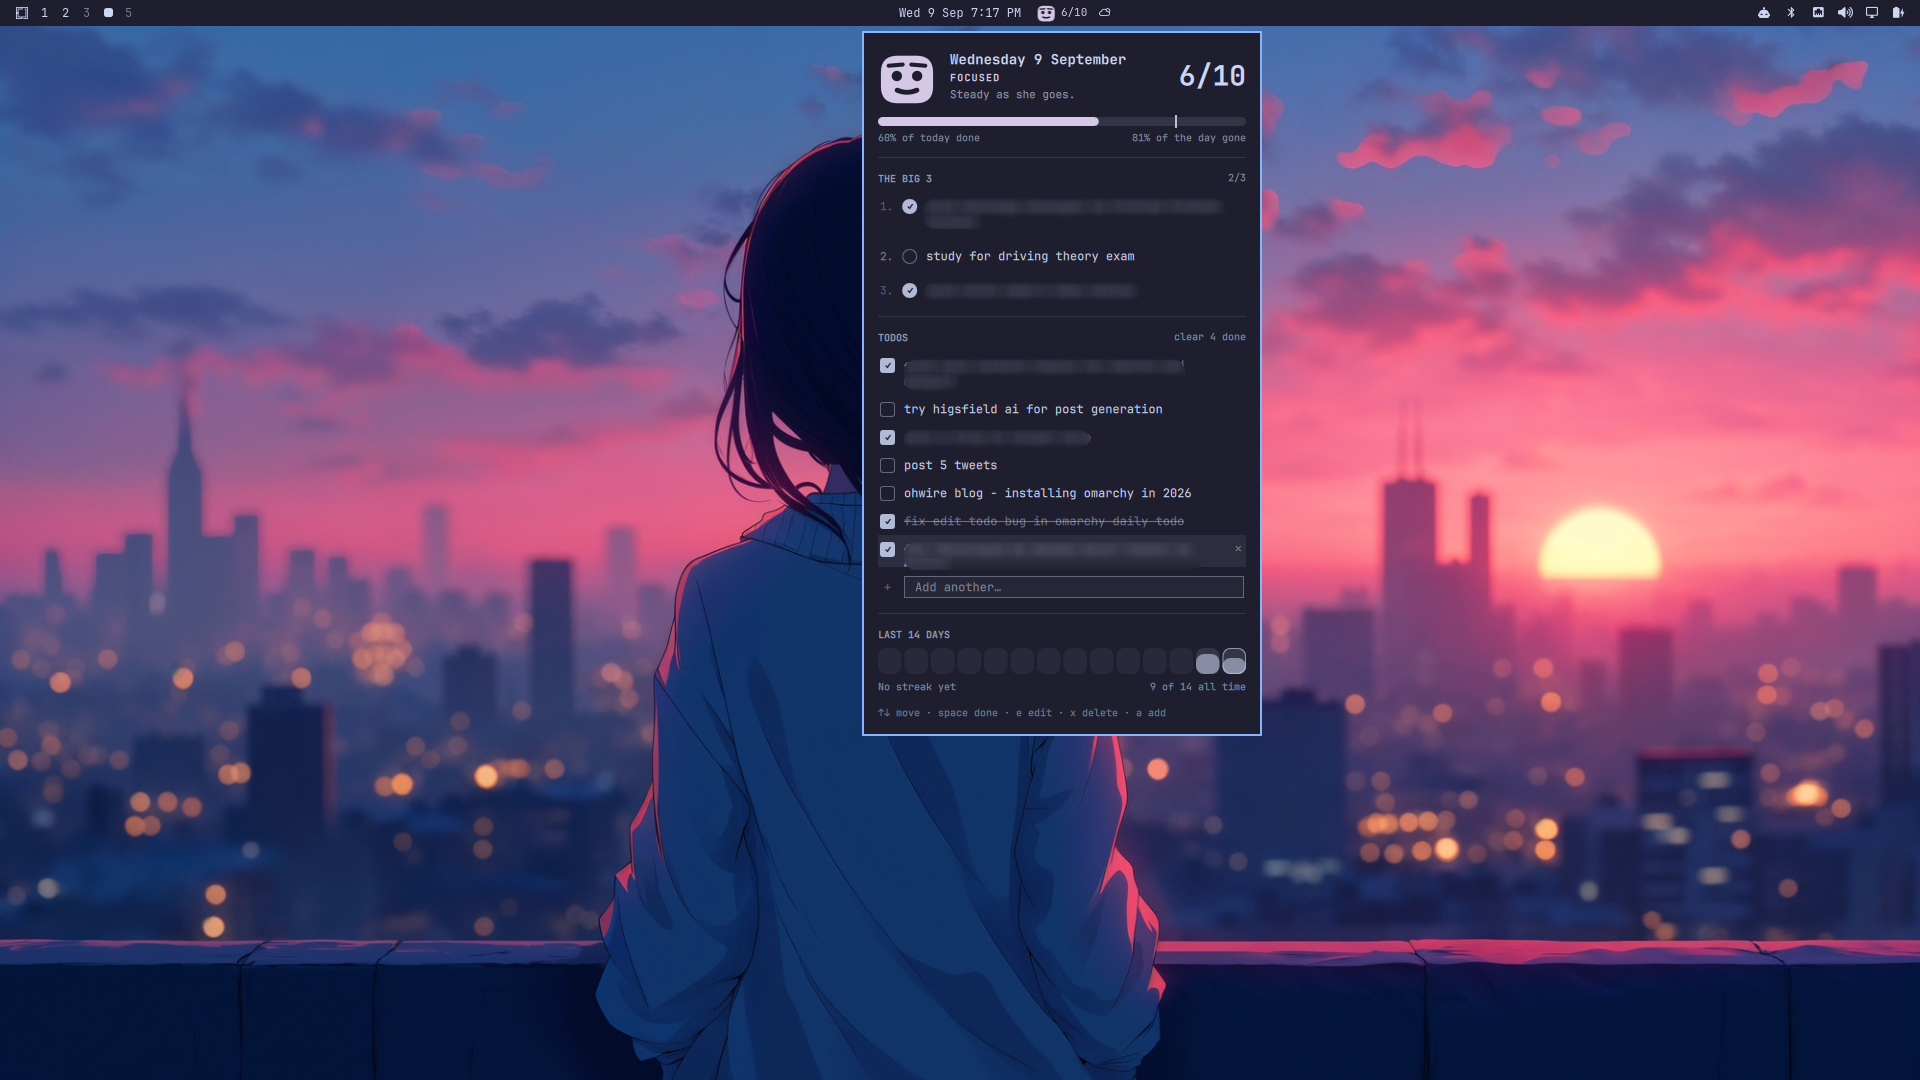
# ohwire - Full Content Archive > Notes from a self-taught developer documenting software architecture, build tools, AI workflows, and development setups. --- ## I dual booted omarchy on my rog strix g15 and it took 4 minutes - **URL**: https://ohwire.xyz/notes/i-dual-booted-omarchy-on-my-rog-strix-g15-and-it-took-4-minutes - **Published**: 2026-09-09 - **Category**: Notes - **Author**: ohwire - **Description**: Installing omarchy on an asus rog strix g15 with hybrid amd + rtx 3050 graphics. everything worked out of the box. here's the full dual boot setup. I've been putting off arch for years. not because i hadn't tried linux. i've run ubuntu, mint, kali, a few others over the years. arch was the one i kept skipping because everyone talks about it like a rite of passage. partition tables, base install, configuring your own bootloader, picking a display manager. it felt like a weekend project i didn't want to start. then i saw omarchy and figured i'd give it a shot on my gaming laptop. ![](/images/screenshot-2026-09-0813-43-02.png) ## Why i did it my main machine has been a macbook for about 4 years. the rog strix was the windows box i'd boot into when friends wanted to play something. over the last few months windows on it got slow. not one specific thing, just the general slide where boot takes longer, explorer hangs for a second, and you start doing the thing where you close stuff you don't remember opening. i'd already decided i was going to wipe it. then i found omarchy and changed the plan. instead of formatting windows i'd dual boot and keep the gaming side around. ## The setup that made this easy worth saying upfront because it removes most of the risk people worry about. this laptop has two 1tb nvme drives. windows lives on one, omarchy went on the other. no partition shrinking, no resizing, no moment where you're staring at gparted hoping you clicked the right thing. if you have two drives, do it this way. if you only have one you'll need to shrink your windows partition first, which is a different post and a lot more careful. ## What i did before installing almost nothing, which surprised me. 1. checked if bitlocker was on. it was off, so i left it alone 2. went into bios and changed the boot order 3. that's it secure boot stayed on. i never turned it off. i've read a lot of asus install guides that tell you to disable it and i just didn't need to. i wrote the usb following omarchy's official instructions, nothing custom. ## The install four minutes. i'm not exaggerating, i went to get water and it was basically done. i picked full disk encryption during setup. that adds a password prompt at boot which i'll get to. then about 30 minutes on top of that to get my dev environment going, editors, runtimes, the usual. so half an hour from usb to actually working. ## The one thing that broke after reboot, windows wasn't in the boot menu. omarchy 4 uses limine instead of grub, and limine didn't pick up the windows install on the other drive by itself. easy fix: ```bash sudo limine-scan ``` reboot and windows was there. one command, whole problem. this is the part i'd have panicked about a few years ago. windows was fine the entire time, the bootloader just didn't know about it yet. ![](/images/screenshot-2026-09-0919-16-23.png) ## About the encryption prompt if you're dual booting and wondering whether encryption makes booting into windows annoying, it doesn't. limine comes up first and you pick your os. the encryption password only appears after you choose omarchy. picking windows goes straight to windows like nothing changed. ## The hardware, which is the part i expected to fight this laptop has a radeon 680m and an rtx 3050 mobile. hybrid graphics on an asus laptop is usually where linux posts turn into a list of things that don't work. i installed no nvidia drivers. none. it worked. everything else out of the box too: - function keys - keyboard rgb - fan control - wifi - bluetooth - sleep and suspend - external monitor i had asusctl and supergfxctl bookmarked ready to install and never opened either tab. > **[image: hyprland desktop, your actual setup]** ## Two small things **caps lock "didn't work."** it did. omarchy maps caps lock to double tapping shift by default. took me a minute to realize nothing was broken and i just hadn't read the keybinds. **helium browser acted up on some sites.** this one was actually the dual gpu setup, both gpus trying to handle rendering at the same time. i threw it at claude code and it was sorted in a couple of minutes. that's the full list of problems. two things, both minor, both my first day. ## Six days in nothing annoying left. i keep waiting for the thing that makes me want to boot back into windows and it hasn't shown up. i've been using it as an actual work machine, and i built a small todo list plugin for it with claude code because i wanted one and it seemed easier than looking for one. ![](/images/screenshot-2026-09-0919-17-55.png) ## If you're thinking about it my honest read is that arch was never the hard part for me, the setup was. omarchy does that setup and hands you something that already works. the dual boot fear is mostly overblown, especially with a second drive. i touched bios once, ran one command, and both operating systems have coexisted fine since. if you've got a rog strix sitting there running a windows install that's gotten slow, this is a pretty low risk afternoon. ![](/images/922e52e1-3e20-4209-8f1b-dbef07af63a9.jpg) --- ## How I Manage Astro Content with Pages CMS - **URL**: https://ohwire.xyz/notes/how-i-manage-astro-content-with-pages-cms - **Published**: 2026-08-27 - **Category**: Tools - **Author**: ohwire - **Description**: Most headless CMS setups are overkill for static sites. Here is how I configure Pages CMS and use it daily to edit Astro content directly on GitHub. import { Code } from "astro-expressive-code/components"; Static sites built with Astro are fast, simple, and cheap to run. You keep your content in Markdown files, commit them to Git, and let your build step handle the rest. This workflow works well when you sit at your desk with your code editor open. It breaks down the moment you want to fix a typo from your phone, write a quick draft on a tablet, or let a non-developer edit a page. The usual solution is to reach for a headless CMS. You look at Contentful, Sanity, or Strapi. Suddenly you have a separate backend to maintain, API keys to manage, network requests on every build, and a monthly bill once you pass free-tier limits. Decap CMS used to fill the file-based gap, but its configuration is messy and development has slowed down. I recently started using [Pages CMS](https://pagescms.org/), and it has become my daily driver for managing content on this blog. It gives you a clean visual editor that commits directly to your GitHub repository without any database or backend servers. ## How it works Pages CMS is an open-source web application. You log in with your GitHub account, pick a repository, and start writing. Under the hood, Pages CMS interacts directly with the GitHub API. When you create or update a post, it commits the file directly to your target branch. Your static hosting provider, like Cloudflare Pages or Vercel, sees the new commit and rebuilds the site. Everything stays in Git. Your repository remains the single source of truth. If Pages CMS ever goes offline, your Markdown files are still in your repository. ## Configuring your content with .pages.yml What made me stick with Pages CMS is how cleanly it defines content schemas. You place a single `.pages.yml` file in the root of your repository. Here is the exact configuration I use for this blog: ## Mapping cleanly to Astro content collections If you use Astro's `src/content.config.ts`, this schema will look familiar. The fields in `.pages.yml` line up with the Zod schema in Astro. Here is the corresponding Astro collection definition: A few details make this setup pleasant to work with: The `body` field is a special key in Pages CMS. When you use frontmatter formats, any field named `body` maps to the Markdown content below the frontmatter. All other fields stay in the frontmatter block at the top. The `media` setting maps your repository upload folder to your public URL. When I drag an image into the editor, Pages CMS commits the file to `public/images/posts/` and inserts `/images/posts/image-name.png` into the frontmatter. That path works in Astro without extra transformations. The `view` object customizes how collection entries appear in the sidebar list. Setting `primary: title` and `sort: publishDate` gives me a clean list sorted by date, exactly like a dedicated blog dashboard. ## How I use it daily Having Pages CMS configured changed how I maintain this blog. First, fixing typos and updating old notes no longer requires a development environment. I open Pages CMS in the browser, find the note in the list, edit the text, and hit save. The commit goes directly to GitHub, triggers my deployment, and goes live in two minutes. Second, drafting happens anywhere. When I get an idea while away from my computer, I open the dashboard on my phone or tablet, fill in the title, pick a category from the dropdown, and start writing. The fields match what Astro expects, so I never forget required frontmatter properties like `publishDate` or `category`. Third, handling media is painless. Instead of manually copying an image file into `public/images/posts/`, renaming it, and typing the relative path into the frontmatter, I drop the image into the cover image field. Pages CMS commits the image file and writes the correct path. ## When to use it Pages CMS is not built for every project. If you have a large marketing team requiring real-time co-authoring, complex staging previews, or editorial review permissions, you need a full enterprise CMS. For developer blogs, documentation sites, and personal projects, it removes the headache of managing databases or third-party storage. You keep the simplicity of Markdown in Git, and you gain a visual dashboard you can access from anywhere. Check out the [official documentation](https://pagescms.org/docs/) to explore more field types and setup options. --- ## A Simple OG Image Tool I Built for Client Work - **URL**: https://ohwire.xyz/notes/a-simple-og-image-tool-i-built-for-client-work - **Published**: 2026-08-01 - **Category**: Tools - **Author**: ohwire - **Description**: I kept running into the same annoyance when delivering client projects, so I spent a few days building a simple open source OG image generator with AI agents. Most of my daily coding involves building websites and web apps for clients. Whenever I get close to wrapping up a project, there is always one small task that ends up being surprisingly annoying. That task is making the social share preview card. Sharing a link with a proper OG image looks much more professional than sending a plain link, so we always try to add OG images to our client sites. Many times I used free online tools or Canva, but I got tired of facing the same issue everywhere with ease of use. There are plenty of OG image generators out there, but none of them felt quite right for a quick workflow. Most of them either try to do way too much with complicated layer editors and endless settings, or they put watermarks and download limits behind a monthly subscription. I didn't need a complex canvas editor or another paid subscription. I just wanted something super simple where I could type in a title, pick a color, and export a clean image without jumping through hoops. ## Building It with AI Agents Since I couldn't find a tool that was simple and out of the way, I decided to build one myself. Over the last few days, I used AI agents to help me put together a lightweight Cloudflare Worker app called **[Shareframe](https://shareframe.ohwire.xyz/)**. Using AI agents made it easy to skip the tedious setup and just focus on making the UI fast and straightforward. The idea is simple. You type your text, tweak the theme in the sidebar, watch the preview update, and save a clean PNG. That is really all there is to it. ## Keeping It Free and Open I originally made this just to speed up my own client deliveries, but I figured other developers might find it useful too. It is 100% free to use, and the code is completely **[open source on GitHub](https://github.com/ohwiredev/shareframe)**. There are no watermarks, no signups, and no paid tiers. Since I am sharing this publicly, I would love to hear what you think. If there is a particular font, layout, or feature you would like to see added, drop an issue on the **[GitHub repo](https://github.com/ohwiredev/shareframe)** or just let me know on **X**! You can try it out at **[shareframe.ohwire.xyz](https://shareframe.ohwire.xyz/)**. Hopefully it saves you a bit of time on your next client project too. --- ## Rethinking PageWeight After Just Six Days - **URL**: https://ohwire.xyz/notes/rethinking-pageweight - **Published**: 2026-06-24 - **Category**: SaaS - **Author**: ohwire - **Description**: Why I decided to pivot my new SaaS project away from a complex web crawler and focus on a GitHub Action instead. import { Code } from "astro-expressive-code/components"; It's only been six days since I started working on PageWeight, and I'm already rethinking the entire project. If you read my previous post, you know the grand vision for PageWeight: a robust SaaS crawler that uses headless browsers to scan entire websites and generate white-label PDF performance audits. It sounded like the perfect, feature-rich platform to build. But the deeper I got into the planning and early development, the more I realized I was getting way in over my head. The project was just too complicated. The amount of moving parts required to build a reliable web scraping engine that handles thousands of pages, analyzes the results, and presents them beautifully is staggering. I found myself staring down the barrel of infrastructure nightmares, edge cases with dynamic content, and a timeline that was stretching from weeks into months. --- ## The Pivot to Simplicity While taking a step back to breathe, I remembered a small part of my initial idea: a CLI tool and GitHub Action that developers could add directly to their CI/CD pipelines to catch bloated assets before they reach production. I started thinking: you can find website audit tools everywhere on the internet. There's Google Lighthouse, GTmetrix, WebPageTest... the list goes on. Another web-based scanner is just a drop in the ocean. But a seamless, low-friction GitHub Action that fails a pull request if an image is too large? That's actually useful. That solves a problem where it happens—at the developer level. Instead of building a massive SaaS that requires users to remember to log in and run scans, what if I iterate on the CI/CD integration and make it the core product? --- ## Am I Just Chasing Shiny Things? I have to be honest: I don't know if this is a good idea. Changing the entire direction of a project just six days in, without having fully implemented the original vision, feels a lot like I might be falling into the same trap that kept my first project, Pocketed, unreleased. Is this a strategic pivot, or am I just avoiding the hard work? Am I chasing something new because I don't really know what I'm doing? I have to take responsibility for the fact that I might just be running from the complexity rather than facing it head-on. But on the other hand, the best tools are often born from simplifying a complex problem. By narrowing the scope from an entire auditing platform to a single, highly effective GitHub Action, I'm drastically reducing the time to launch. I'm forcing myself to build something tangible and put it in front of users quickly. If it fails, I fail fast. If it succeeds, I have a solid foundation to build upon. For now, PageWeight is no longer a crawler. It's a performance gate for your repository. I'll let you know in a few weeks if this pivot was a stroke of genius or just another distraction. --- ## Why My First SaaS is Still Unreleased (and How I Shipped My Second) - **URL**: https://ohwire.xyz/notes/why-my-first-saas-is-still-unreleased - **Published**: 2026-06-19 - **Category**: SaaS - **Author**: ohwire - **Description**: How building my second micro-SaaS, PageWeight, taught me the value of shipping functional developer tools early instead of over-engineering the 'perfect' SaaS. import { Code } from "astro-expressive-code/components"; Developers often keep half-finished side projects with authentication, billing integrations, and complex settings but zero active users. For me, that project is Pocketed. Pocketed is a mobile-first progressive web app. It lets users save videos from TikTok, Instagram, or YouTube and locate them using AI-powered tagging and search. Platform-native save features are often buried and unsearchable. Pocketed solves this by creating a single home for saved videos. I spent months developing Pocketed. I integrated Clerk, set up Stripe, built Framer Motion animations, and refined the design. However, I delayed the launch to add more features and improve the search. Pocketed remains unreleased. When building my second micro-SaaS, PageWeight, I decided to change my approach. I avoided over-engineering. I focused on shipping a functional command-line utility first. --- ## The Problem: Web Bloat and LCP Web performance affects conversion rates. If a website takes longer than three seconds to load, half of the visitors leave the page. The primary cause of slow load times is media bloat. Developers deploy large images and video files without compression. This degrades Largest Contentful Paint (LCP), a Core Web Vital that affects search engine rankings. Auditing media files manually is slow. For PageWeight, the long-term plan is a SaaS crawler. It will scan sites using headless browsers to generate white-label PDF performance audits for agencies. However, building a complete SaaS with background workers and database configurations takes time. To avoid development delays, I built a simple CLI tool and a GitHub Action instead. --- ## Building the Performance Gate The performance gate prevents bloated files from reaching production. We built a Python CLI tool that scans directories and evaluates files against a performance budget. Developers place a `pageweight.json` configuration file in the project root: The CLI traverses the folders and validates images and videos. To keep the tool fast, we avoided using heavy libraries like OpenCV or Pillow. PageWeight uses the `imagesize` library to read image headers. This allows the CLI to extract width and height without loading the full file into memory: max_width: return False, f"Width ({width}px) exceeds budget of {max_width}px" return True, "PASS" except Exception as e: return False, f"Could not parse image dimensions: {str(e)}" `} lang="python" title="pageweight-cli/scanner.py" /> If an asset violates the budget, the CLI returns exit code 1. --- ## Automating the Build Gate The CLI is packaged as a Docker-based GitHub Action. When a developer opens a pull request, the performance gate runs before the build phase. If an image exceeds the budget, the build fails and prevents the merge. Here is the configuration for the GitHub Actions deployment workflow: --- ## Shipping is a Feature The SaaS crawler and custom reports are still in development, but the CLI tool is functional and active. Building PageWeight demonstrated that shipping early is essential for success. It helped resolve analysis paralysis, created a working tool, and established the engine for the future SaaS product. For developers struggling to launch a project, the solution is to remove unnecessary features like dashboards, auth, and billing. Identify the core command-line utility or API, build it, and launch it. *PageWeight CLI is open source. You can check it out and add it to your repo today. What is holding back your first project? Let me know in the comments below!* --- ## Supercharge Your PowerShell for Maximum Productivity - **URL**: https://ohwire.xyz/notes/supercharge-your-powershell-for-maximum-productivity - **Published**: 2026-06-16 - **Category**: Setup - **Author**: ohwire - **Description**: Learn how developers use PowerShell profiles, custom aliases, and advanced functions to streamline their daily workflows. import { Code } from "astro-expressive-code/components"; Your PowerShell profile is the backbone of your command-line experience on Windows. Because it runs every time you open a new session, customizing it with aliases, functions, and prompt enhancements can save you thousands of keystrokes over time. In this post, we'll dive into how modern developers optimize their `$PROFILE` to streamline workflows with Git, Docker, package managers, and more. ## The Foundation Keep It Modular Rather than dumping hundreds of lines of code into a single file, best practice dictates keeping your profile modular. Many developers source different script files (e.g., `Git-Aliases.ps1`, `Docker-Functions.ps1`) from their main profile. This keeps the main `$PROFILE` lean and speeds up terminal launch time. If you find yourself with complex logic, consider wrapping your functions in a **custom module** and using `Import-Module` instead. ## Navigation and Daily Drivers Let's look at some personal favorites. The core of productivity is moving around your file system quickly and starting up standard tasks without friction. Here is an example of my personal PowerShell profile snippet designed for rapid navigation and daily server setups ### Breaking It Down - **`tt`** Opens a new Windows Terminal tab in the current working directory. - **`Code`** A custom function with an argument completer. It provides tab-completion for directories inside `D:\Code\`, allowing me to quickly jump to any project with a simple `Code ohwire-blog` command. - **`Start-Server`** A rapid alias to spin up a local Python HTTP server on port 8000 for quick testing. ## Taming Package Managers If you work in web development, you are constantly running scripts. Setting up short aliases for your package manager of choice (like `pnpm`, `npm`, or `yarn`) is a huge time-saver. Here are some concise functions for PNPM By passing `@args`, you ensure that any additional flags you provide in the terminal (like `prd --port 3000`) are passed directly to the underlying `pnpm` command. ## Advanced Workflows Git, Docker, and Cloud CLIs While simple aliases (`Set-Alias`) are great, they have limitations. To truly elevate your setup, developers use **Advanced Functions** to handle complex toolchains. ### Docker and Git Wrappers Instead of just aliasing `git status`, you can write wrappers to combine commands ## Conclusion Your PowerShell profile is a personal workspace. By combining custom navigation functions, argument completers, and smart tool wrappers, you can transform Windows Terminal into a powerhouse of productivity. Don't be afraid to continually tweak and refine your `$PROFILE` every keystroke saved is a win! --- ## Why I Replaced ESLint and Prettier with Biome - **URL**: https://ohwire.xyz/notes/why-i-replaced-eslint-prettier-with-biome - **Published**: 2026-06-15 - **Category**: Tools - **Author**: ohwire - **Description**: A deep dive into Biome (the Rust-based toolchain), comparing its performance, simplicity, and formatting/linting rules to the traditional ESLint + Prettier stack. import { Code } from "astro-expressive-code/components"; For years, the combination of ESLint and Prettier has been the undisputed standard for JavaScript and TypeScript projects. But recently, a new Rust-based contender has taken the ecosystem by storm: **Biome**. After using it to manage my own projects, I've officially replaced the old stack. Here's a look at why. ## The Problem: Configuration Fatigue The combination of ESLint (for code quality) and Prettier (for formatting) has caused significant friction due to overlapping responsibilities: - **Conflicting Rules:** ESLint and Prettier often fight over stylistic rules, like quotes and trailing commas. - **Dependency Bloat:** A standard setup requires juggling a massive web of dependencies (`eslint`, `prettier`, `@typescript-eslint/parser`, `eslint-config-prettier`, and `eslint-plugin-prettier`). - **Performance Overhead:** Integrating Prettier directly into ESLint forces Node to parse the Abstract Syntax Tree (AST) multiple times, drastically slowing down lint times. - **Multiple Config Files:** You often end up with an unmanageable number of config and ignore files (`.eslintrc`, `.prettierrc`, `.eslintignore`, `.prettierignore`). ## The Solution: Biome's Unified Pipeline Biome (formerly Rome) provides a modern, unified alternative. Written entirely in Rust, it combines linting, formatting, and import sorting into a single, cohesive tool. Because it's a unified toolchain, Biome fully eliminates rule conflicts. The formatter and linter are designed from day one to work together seamlessly using just one configuration file: `biome.json`. Here is an example of a `biome.json` file I use for my projects: Notice the simplicity: 1. **VCS Integration:** `useIgnoreFile: true` tells Biome to natively respect your `.gitignore`. 2. **Built-in Assistance:** Tools like `organizeImports` are baked right in. 3. **Unified Rules:** You can toggle specific linting rules natively without installing five different plugins. ## The Speed Difference (10-25x Faster) The performance difference is staggering. Because Biome is compiled to native machine code, there is no Node.js startup time, no JIT compilation, and no Garbage Collection pauses. Furthermore, because Biome is a unified toolchain, it parses the code into an AST **only once** and performs linting, formatting, and import sorting simultaneously using multi-threading. For medium-to-large codebases, where ESLint and Prettier might take several seconds, Biome typically completes both formatting and linting in the **sub-second range (around 300–800 milliseconds)**. It's so fast that running it in a pre-commit hook feels completely unnoticeable. ## Trade-offs: When Not to Use Biome While I highly recommend Biome, there are still a few areas where ESLint holds the crown: - **The Plugin Ecosystem:** ESLint boasts over 4,000 community plugins. Biome operates on "in-tree" rules—it bakes in hundreds of popular rules natively but does not support arbitrary third-party plugins. - **Deep Type-Aware Linting:** `typescript-eslint` has highly mature, deep type-aware linting. Biome's type-aware linting is progressing quickly but still lacks some edge cases. - **Framework Template Support:** Support for parsing and linting complex template files like `.vue`, `.svelte`, or `.astro` is still experimental or partial in Biome, compared to ESLint's established ecosystem. ## Conclusion If you're spinning up a greenfield JS, TS, or React project today, Biome is a massive win for simplicity, speed, and developer experience. By replacing a messy web of dependencies with a single, blazing-fast binary, Biome eliminates configuration fatigue and lets you focus strictly on writing code. --- ## Why Zed is Becoming My Primary Editor - **URL**: https://ohwire.xyz/notes/why-zed-is-becoming-my-primary-editor - **Published**: 2026-06-06 - **Category**: Tools - **Author**: ohwire - **Description**: A review of the newly emerging Zed editor, exploring its speed, collaborative features, and how it compares to VS Code. import { Code } from "astro-expressive-code/components"; For nearly a decade, VS Code has been the undisputed king of code editors. However, the team behind Atom and Tree-sitter has built Zed, a new Rust-based editor designed for extreme performance and collaborative coding. After using it as my daily driver for two weeks, here is my honest review. ## The Speed Difference The first thing you notice when opening Zed is the speed. It loads in a fraction of a second, files open instantly, and there is zero typing latency. Zed is GPU-accelerated and written in Rust, which allows it to utilize every CPU core efficiently. If you are used to the slight micro-delays in Electron-based editors, Zed feels like a breath of fresh air. ## Collaborative Coding Zed was built from the ground up for real-time collaboration. It includes a built-in concept of "Channels" and "Projects" that multiple developers can join. You can see other developers' cursors, edit the same file simultaneously, and share terminal outputs without needing to screen-share on Zoom. ## VS Code vs. Zed: What's Missing? While the speed is incredible, Zed is still growing. Here are a few things that might hold you back: - **Extension Ecosystem**: While Zed has a package system, it is not as vast as VS Code's. - **Configuration**: While Zed now includes a GUI settings editor for common options, many advanced configurations still require directly editing the `settings.json` file. - **Complex UI Tooling**: Some advanced debugging tools and git clients that integrate directly into VS Code are not yet fully implemented in Zed. Here is an example of a typical `settings.json` configuration in Zed: ## Conclusion If you want a blazing fast editor for writing code, writing prose, and collaborating with a peer, Zed is unmatched. It has earned a permanent spot on my dock. --- ## Agentic Skills ### Git Commit - **Role**: Version Control - **Description**: Automatic commit message generator and fast AI-powered commit workflow for all current changes. - **Repository**: https://github.com/ohwiredev/my-skills/blob/main/git-commit/SKILL.md This AI agent skill provides an automated, intelligent workflow for Git commits. It analyzes all of your staged and unstaged changes, automatically crafts a descriptive, conventional commit message based on your codebase history and conventions, and commits the code. This radically speeds up the development process by offloading the mental overhead of writing clean commit messages.